Last updated and reviewed: September 2023
Time needed to execute: 2 Hours
Skill level: Advanced
Possible Scenarios
Are you experiencing GA4 migration issues? Phase 1 of Google’s auto-migration includes a limited and basic setup, it’s not designed to capture the specific data your business needs to accurately measure marketing, sales and website performance.
The reality is there’s no one-size-fits-all when it comes to data and analytics. By electing to auto-migrate, you run the risk of a complete and utter failure of your analytics data.
As outlined in a previous blog post there are significant differences in the data model between UA and GA4, and the auto-migration has no way of taking into account your unique analytics architecture.

Google does not consider you fully migrated if you fall into one of the following three scenarios:
- Scenario 1: You have an existing UA property but have not yet set up a GA4 property, and the UA property was not opted out of the auto migration.
- Scenario 2: You have created a GA4 property that is not linked to a UA property.
- Scenario 3: You have created a GA4 property and linked it to a UA property, but have not completed all twelve (12) GA4 setup assistant steps (see image below).
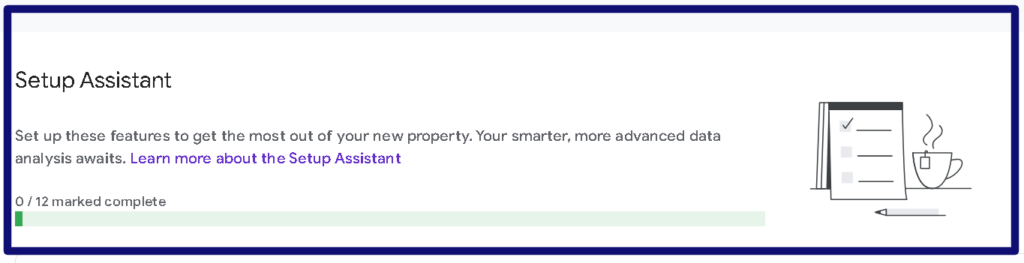
You might be thinking that because you’ve linked a GA4 property to UA already that your work is done.
However, word on the street is that Google may still run a full auto-migration and auto-configuration on your GA4 property if you’ve not fully completed the 12 steps outlined in the GA4 Setup Assistant so I recommend starting from scratch.
🖱 Step 1 – Confirm That You’re Collecting Data
If you’re using a website, the first thing you need to do is check that the correct web data streams have been added to your GA4 property.
You can have three types of data streams in a single GA4 property, compared to the UA property, where you would create a separate property for each data source (web, iOS, Android).
In GA4, your structure is Account>Property>Data streams.
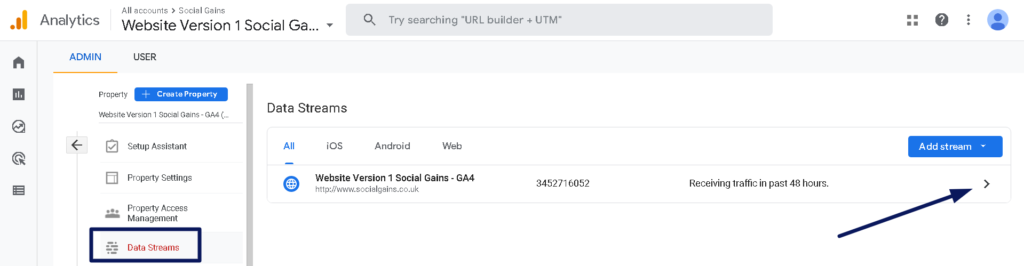
I recommend removing any unwanted web data streams and then validating that the measurement code has been added to your website correctly.
If you need help setting up Google Tag Manager or installing GA4 via GTM then consider the Toolbox (Genius Edition) below for step-by-step instructions and tips on best practices.

Scale your business like an 8- or 9-figure company with AI systems.
I’m inviting the first few members in free for life as “founding members“. Learn how to scale your business like an 8- or 9-figure business, dominating search engines and capturing demand.
If you want in, get access to proven AI marketing and sales techniques that drive real results.. Join our free AI Skool group today.
🖱 Step 2 – Review Property Settings
Google Signals is a powerful advertising reporting feature through which GA4 can collect cross-device data from specific website users who have signed in to one of their Google accounts (Gmail, YouTube, etc) and have activated ad personalisation.
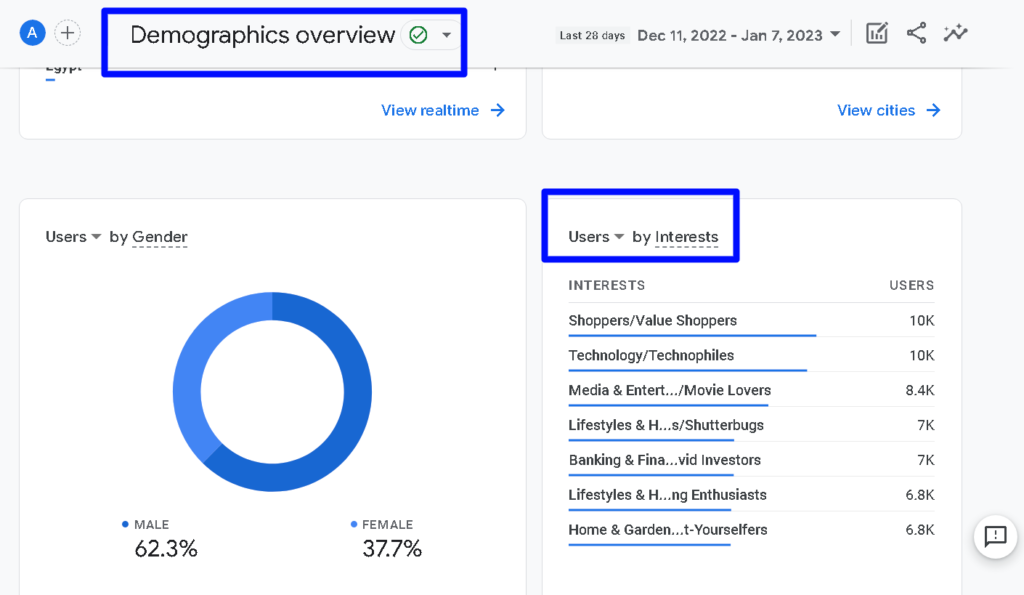
By default, Google Signals are disabled. Once enabled, you have to wait 24-48 hours for the new data to start populating.
To turn this setting on head over to Admin > Property > Data Settings > Data Collection
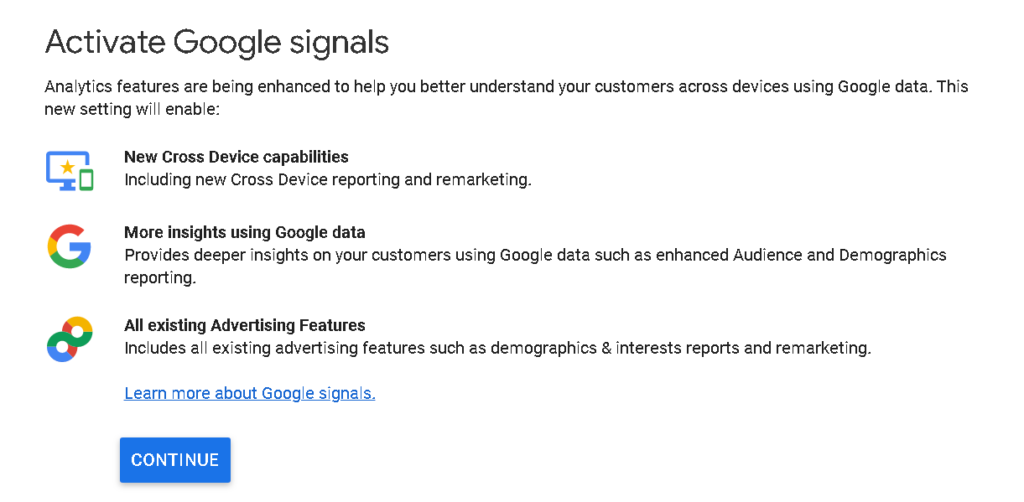
When you turn on Google Signals in your GA4 Property, you can:
- More accurately track users across different devices and platforms.
- Remarket to more website users across devices.
- Analyse users’ data by age, gender, and interests
- Populate and export audiences to YouTube.
📢📢📢 Genius Tip: October Update 2023…..Google has released a new feature that allows you do exclude Google Signals data from the reporting identity. This means that you can still use Google Signals for audiences (imported in Google Ads), but it will not mess up with user counts and thresholding in your reports if you are using blended or observed reporting identities.
You can manage this in Admin > Data Setting > Data Collection. Then disable the Include Google signals in reporting identity.
More information available here in Google Support Docs
🖱 Step 3 – Audit & Review Goals
Google references existing conversions set up in UA and identifies whether they are eligible to be migrated over to GA4.
Eligible conversions are mainly events and destination goals. Goals using regex or other types are currently not eligible for migration.
Remember, If you allow Google to migrate your existing UA conversions to GA4, and you haven’t taken the time to review them, it could cause serious issues with your Google Ads bidding strategy.
Because you are risking an automated process by investing your budget in a way that is potentially not optimised toward your current goals.
If Google has already migrated your UA conversions to GA4, follow the steps under “To Delete an Unwanted Conversion” below.
To Delete an Unwanted Conversion:
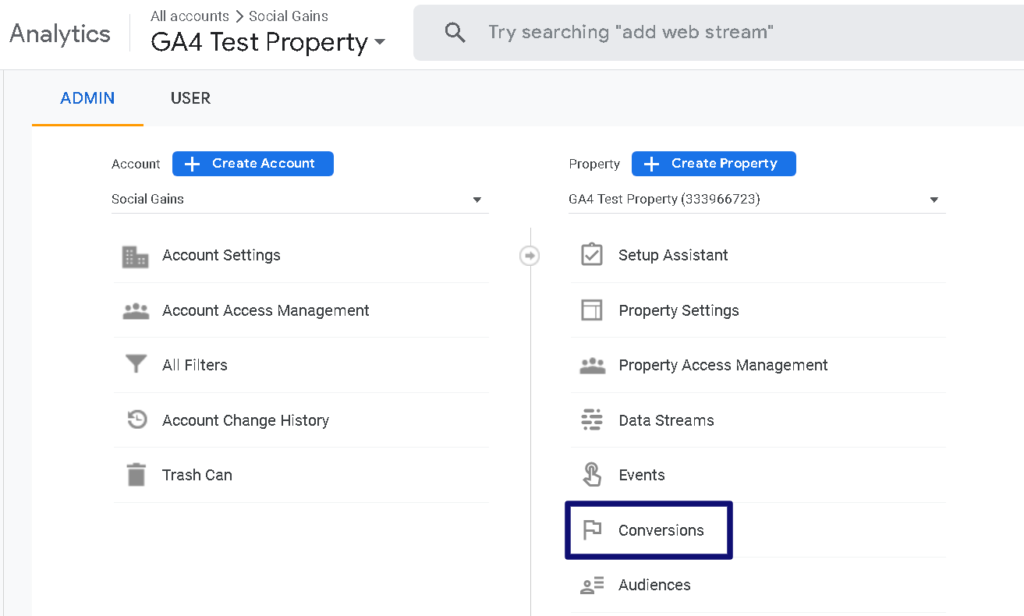
🖱 Step 3.1 In Admin, head over to Conversions, listed under Properties.
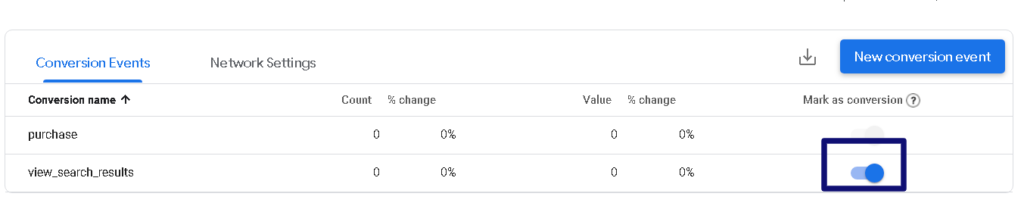
🖱 Step 3.2 It’s a simple one-click process to turn off non-essential Conversions. For all conversions no longer required simply turn its toggle off.
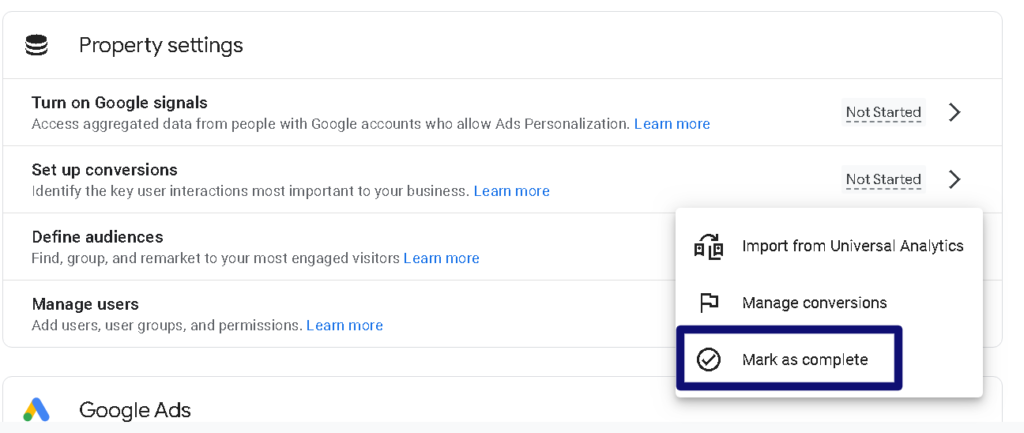
🖱 Step 3.3 To Import a Conversion from Universal Analytics simply head over to the GA4 Setup Assistant and click the ᐳ arrow next to Set up conversions.
📌Genius Tip: If Google has not already migrated your conversions from Universal Analytics and you don’t want them to – and it’s too late to opt out mark them as complete from the drop-down menu in the Setup Assistant
🖱 Step 4 – Configure GA4 Audiences
By default, Google will migrate all of your UA audiences to GA4. If this has happened already follow the steps under “To Delete an Unwanted Audience” below:
🖱 Step 4.1 In Admin, head over to Audiences under Properties
🖱 Step 4.2 You can select each audience that you want to delete by hovering your mouse over it.
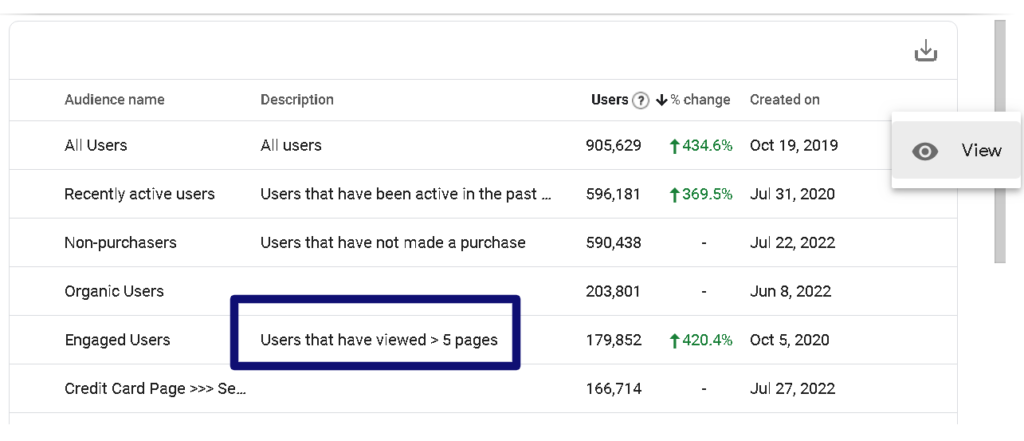
🖱 Step 4.3 click the vertical 3-dot icon, and then click Archive.
📌Genius Tip: Make sure that, at minimum, you have “Viewer access” to your Universal Analytics property and Editor access to your Google Analytics 4 property.
If the drop-down menu provides the option, you can also import existing audiences from Universal Analytics into GA4 by clicking “Import from Universal Analytics”.
This takes you to this page The following instructions are based on the above documentation, refer to the above link for detailed instructions and screenshots.
You will also install need to install the Google Sheets add-on using this link:

As an alternative option, you can also access this add-on directly via Google Sheets by heading over to Extensions > Add-ons > Get add-ons and searching for “GA4 Migrator for Google Analytics”.
Click Install then follow the installation prompts. Once you’ve installed and activated the Google Sheets add-on you can:
- Import the audience definitions from your Universal Analytics property to a new Google Sheet.
- Decide how you want to export audiences from your Google Sheet to your Google Analytics 4 property (using existing definitions or modifying them within the tool).
- If your audiences are compatible with GA4, the “Action” column will show “Ready to migrate”.
- Otherwise, it will show “Not compatible with GA4”.
- Export your audiences from the Google Sheet to your GA4 property.
- Set this step to Mark as complete in GA4 Setup Assistant if not already done.
🖱 Step 5 – Manage User Access Levels
There is a myriad of reasons not to share your Google (Analytics) account details with other people and 3rd parties. For example, you don’t know who is going to have access to your data and you can’t protect your account without changing your password. Don’t do it.
There may also be users you DO NOT want to migrate to GA4. If you empower Google to do it, they’ll literally migrate everyone from UA.
If that has already happened, follow the steps under to delete an unwanted user below.
🖱 Step 5.1 Go to Property Access Management under Properties (or under GA4 Setup Assistant, click “Manage users” from the dropdown menu)
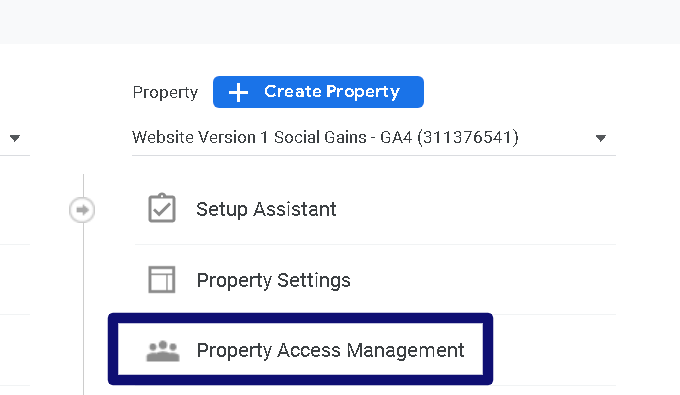
🖱 Step 5.2 For any user you don’t want to keep in GA4, click on the vertical 3-dot icon and click Remove.
🖱 Step 5.3 To Import Users from Universal Analytics In the GA4 Setup Assistant, click the ᐳ arrow next to Manage Users and then click Import from Universal Analytics.
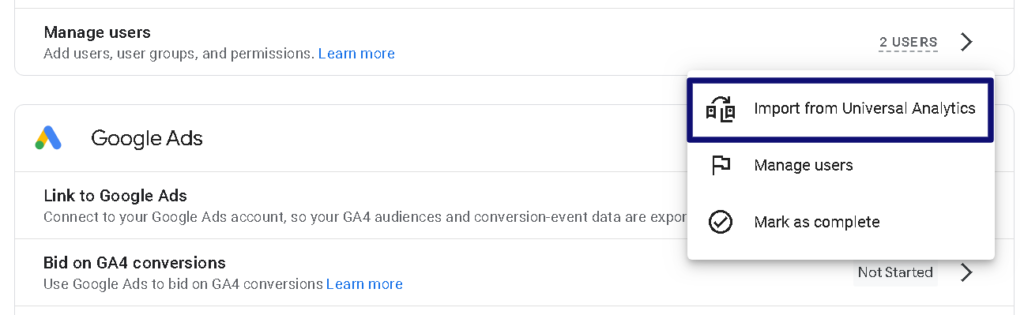
The following instructions below are high-level summaries, for comprehensive, detailed instructions and screenshots click here.
- Import user permission settings from a Universal Analytics property into a new Google Sheet
- Decide how to migrate each user by selecting their permissions. The “Action” column will show “Ready to migrate” if at most one role has been specified for each user.
- If a user has more than one role selected, you will need to decide which role to migrate that user as or leave all roles unselected if you do NOT want to migrate the user.
- Migrate/export your user permission settings to your GA4 property.
📌Genius Tip: To add or modify users or user groups, you need to have the Administrator role at the account or property level.
🖱 Step 6 – Delete Any Unwanted Google Ads Links
Check if there are any linked Google Ads accounts that you do NOT want in your GA4 property, by heading over to Admin:
- Click Admin
- Scroll down to Product Links under the “Properties” column.
- Click any unwanted Google Ad Links for the account that you don’t want in your GA4 property.
- Click the ᐳ arrow.
- Click the 3-dot menu on the upper right.
- Click Delete.
- The next screen will ask if you are positive you want to delete this link.
- Click Delete if you are sure.
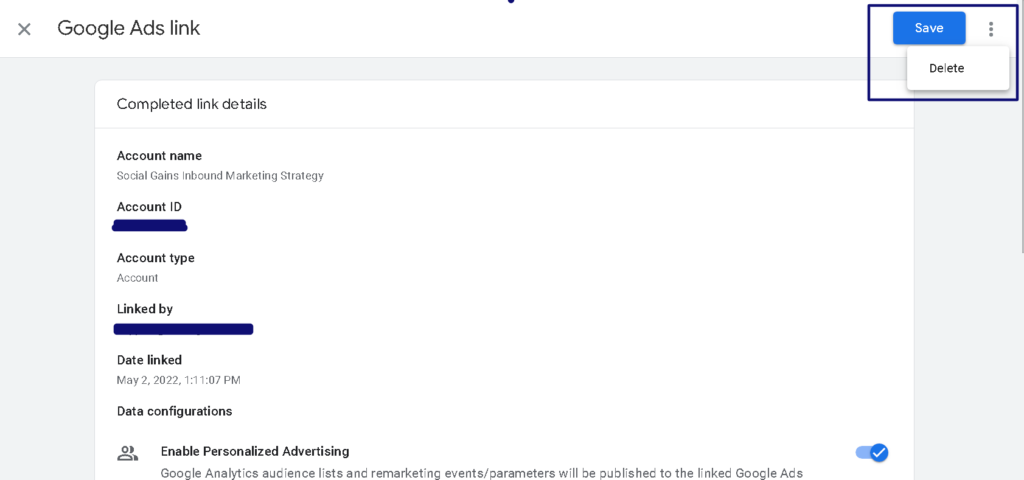
If you would like help adding or Re-Adding your Google Ads Link this is covered in exhaustive detail via our GA4 Toolbox (Genius Edition). Learn more here.

🖱 Step 7 – Bidding On GA4 Conversions
To avoid duplicate conversion counts, I recommend you stop bidding on Universal Analytics and replicate those conversions in your Google Analytics 4 property. As I write this blog post we are less than 3 months away from the transition for non-360 customers.
Implement these simple steps below to stop bidding on those conversions and start bidding on GA4 conversions.
🖱 Step 7.1 Double-check your conversions in GA4 as outlined in Step 3 above.
🖱 Step 7.2 Select your linked Google Ads accounts. (If you have not already linked Google Ads to GA4, see Step 6 for further instructions).
🖱 Step 7.3 In the top right, click Tools and Settings.
🖱 Step 7.4 Under the Measurement section, select Conversions.
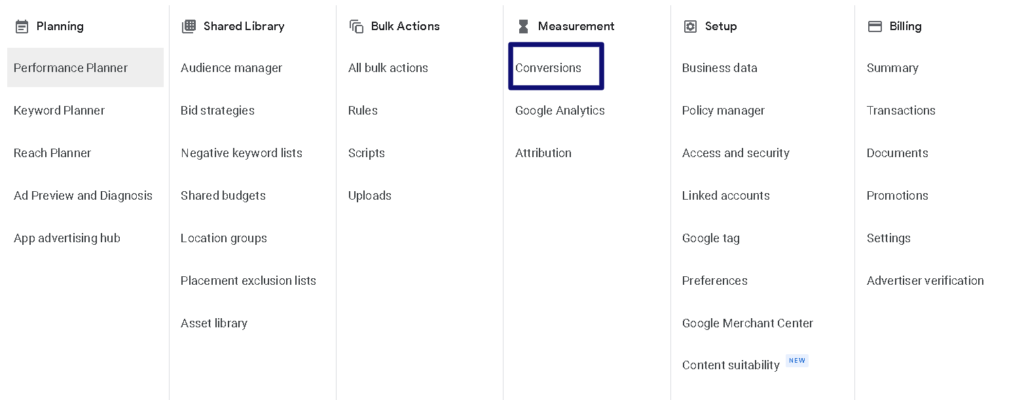
🖱 Step 7.5 Under the Conversion source column, find any conversions set to Website (Google Analytics (UA))
🖱 Step 7.6 For each of these conversions, make sure you’ve created an equivalent GA4 conversion, and imported it into Google Ads.
🖱 Step 7.7 After you’ve validated your conversions, the next step is to switch the GA4 conversions to primary and the UA conversions to secondary.
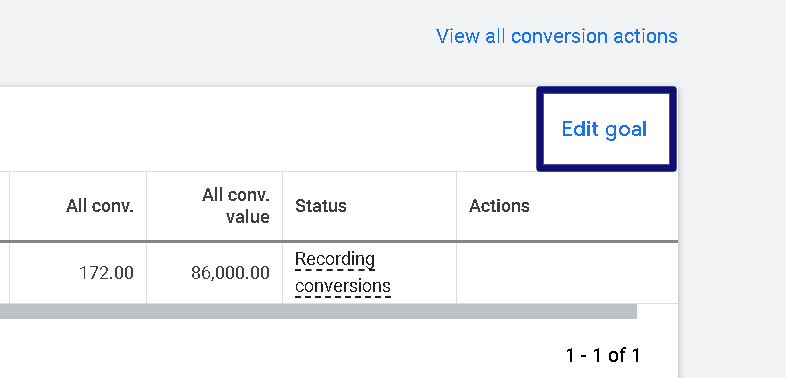
🖱 Step 7.8 For the conversion action you want to edit, click Edit goal.
🖱 Step 7.9 For UA conversions, select Secondary action (observe only).
🖱 Step 7.10 For GA4 conversions, select the Primary action.
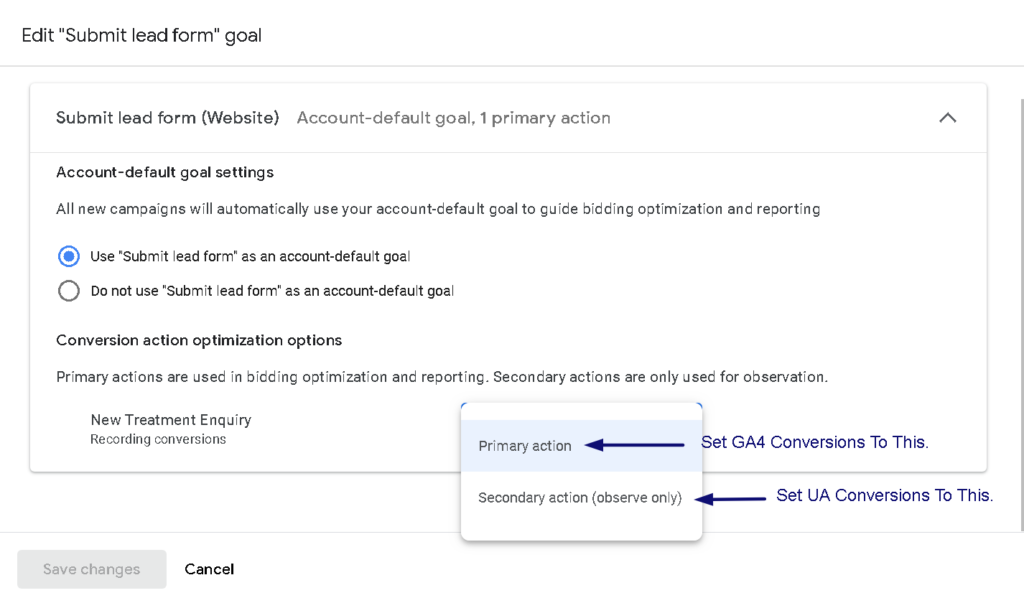
🖱 Step 7.11 Click Save changes
🖱 Step 7.12 Set this step to Mark as complete in GA4 Setup Assistant if not already done. If you need more support head over to this resource: Bid on Google Analytics 4 conversions in Google Ads
📌Genius Tip: If you are a big advertiser with a large volume of conversions, consider utilising the Google Ads API and Google Analytics API or Google Ads Editor to make these changes at scale.
🖱 Step 8 – Advertising To GA4 Audiences
Are you still using Universal Analytics audiences for Remarketing? If so, it’s time to implement the steps below to stop bidding on those conversions and start bidding on GA4 conversions instead.
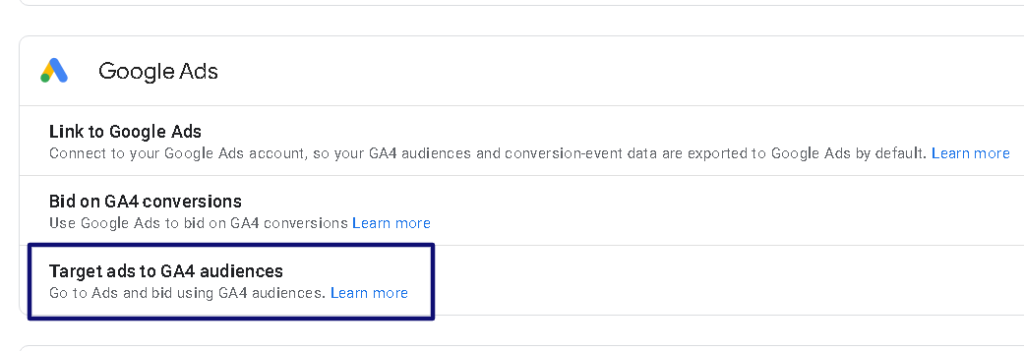
Google Ads has rolled out a new feature that provides direct access to the GA4 audience builder, simplifying the audience creation process.
🖱 Step 8.1 If using Google Ads for remarketing head over to your linked Google Ads accounts.
🖱 Step 8.2 Have you linked Google Ads to GA4? If not head back to Step 6
🖱 Step 8.3 Ensure the default option “Enable Personalised Advertising” is enabled
🖱 Step 8.4 Turn on Google Signals as outlined in Step 2
To switch audiences in Google Ads for proper audience migration you can follow the process in the GA4 Setup Assistant here:
📌Genius Tip: Wait about two weeks after implementing your GA4 audiences, then compare the sizes of your equivalent UA and GA4 audiences.
You’ve made it this far, congrats,🏆🏆🏆 that’s real dedication. So what’s next? Firstly if you have any questions send them over to support@socialgains.co.uk.
Next, it’s time to review advanced setup processes (if required) including “Importing Data”, “Linking To BigQuery”, and using the “Measurement Protocol”. All this is covered in our Toolbox (Genius Edition).
Key Takeaways
- The reality is there’s no one-size-fits-all when it comes to data and analytics. By electing to auto-migrate, you run the risk of a complete and utter failure of your analytics data.
- By Automigrating you risk accidentally copying outdated/unused events, and missing out on important new events/actions that you need to track data accurately in GA4.
- You can always use the GA4 Setup Assistant. The GA4 Setup Assistant is a 12-step tool that helps you track your GA4 migration progress. It has some useful tools such as help with audience migration and a more streamlined process for Google Ads linking.